Extra reproducibility
This file contains extra notes that aren’t required for the module, but might be if you get stuck in future analysis.
8.17 Git and GitHub
8.17.1 Back in time
8.17.1.1 Git
Here, we’re going to use code seen in the section of existing project (way 3).
To quick recap here, i have an RProject with some files in, one of which is the test_file.R seen in the in the section of existing project (way 3).
We also added some code to this file in the section pulling from GitHub.
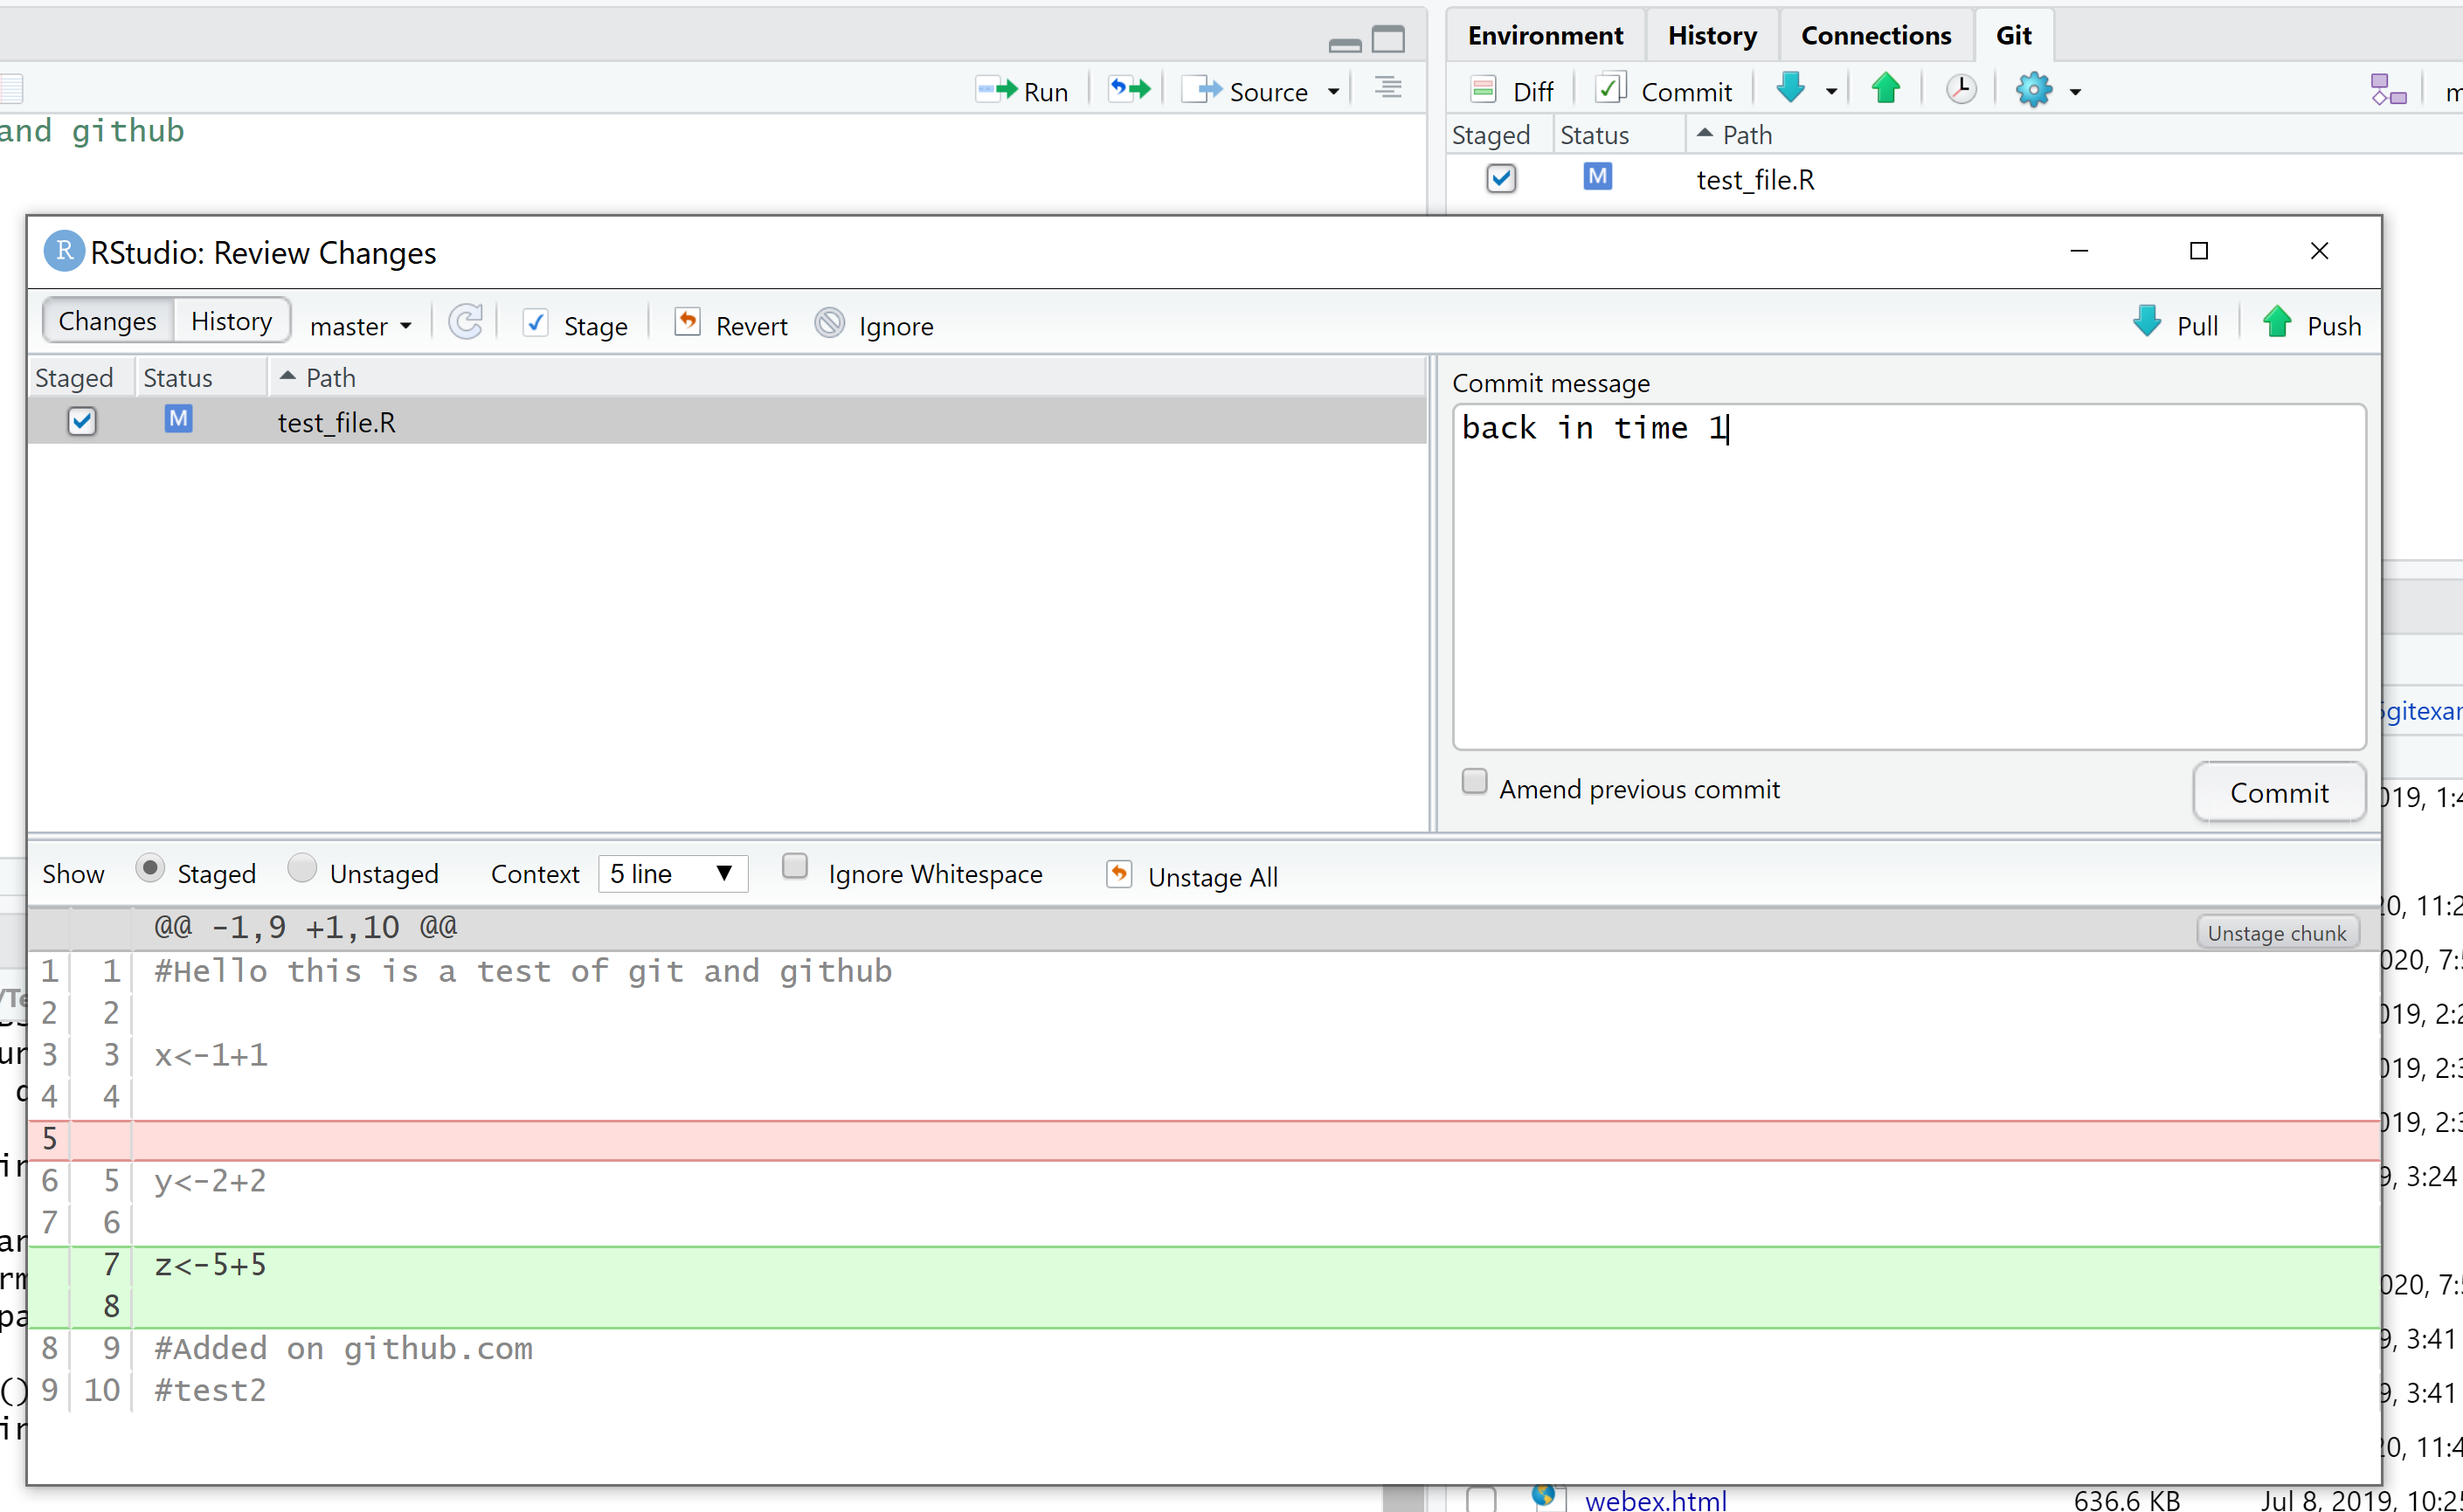
Now, we are going to add some more code then go back in time to remove it. I’ve added z<-5+5 to my script and you can see the file has come up in the Git tab (also called the Git working directory) on the right hand side.

Now, as we have done before, Commit(in the Git tab) then the review changes window comes up. Add a commit message, click stage and the Commit. ** Don’t push to GitHub yet**

But wait, you’ve just received an urgent email (probably using the high importance flag) that the variable z should be deleted, renamed t and be equal to 2. Now, of course, we could just rename it here manually and Commit our changes. But what if you have a large project (like this book!) and make mistakes on several scripts or RMarkdown documents and you need to undo them (like the undo button in Microsoft software). Here we are going to show that.
To do this we need to clearly know what we are trying to acheive, for us it’s easy, go back one commit.
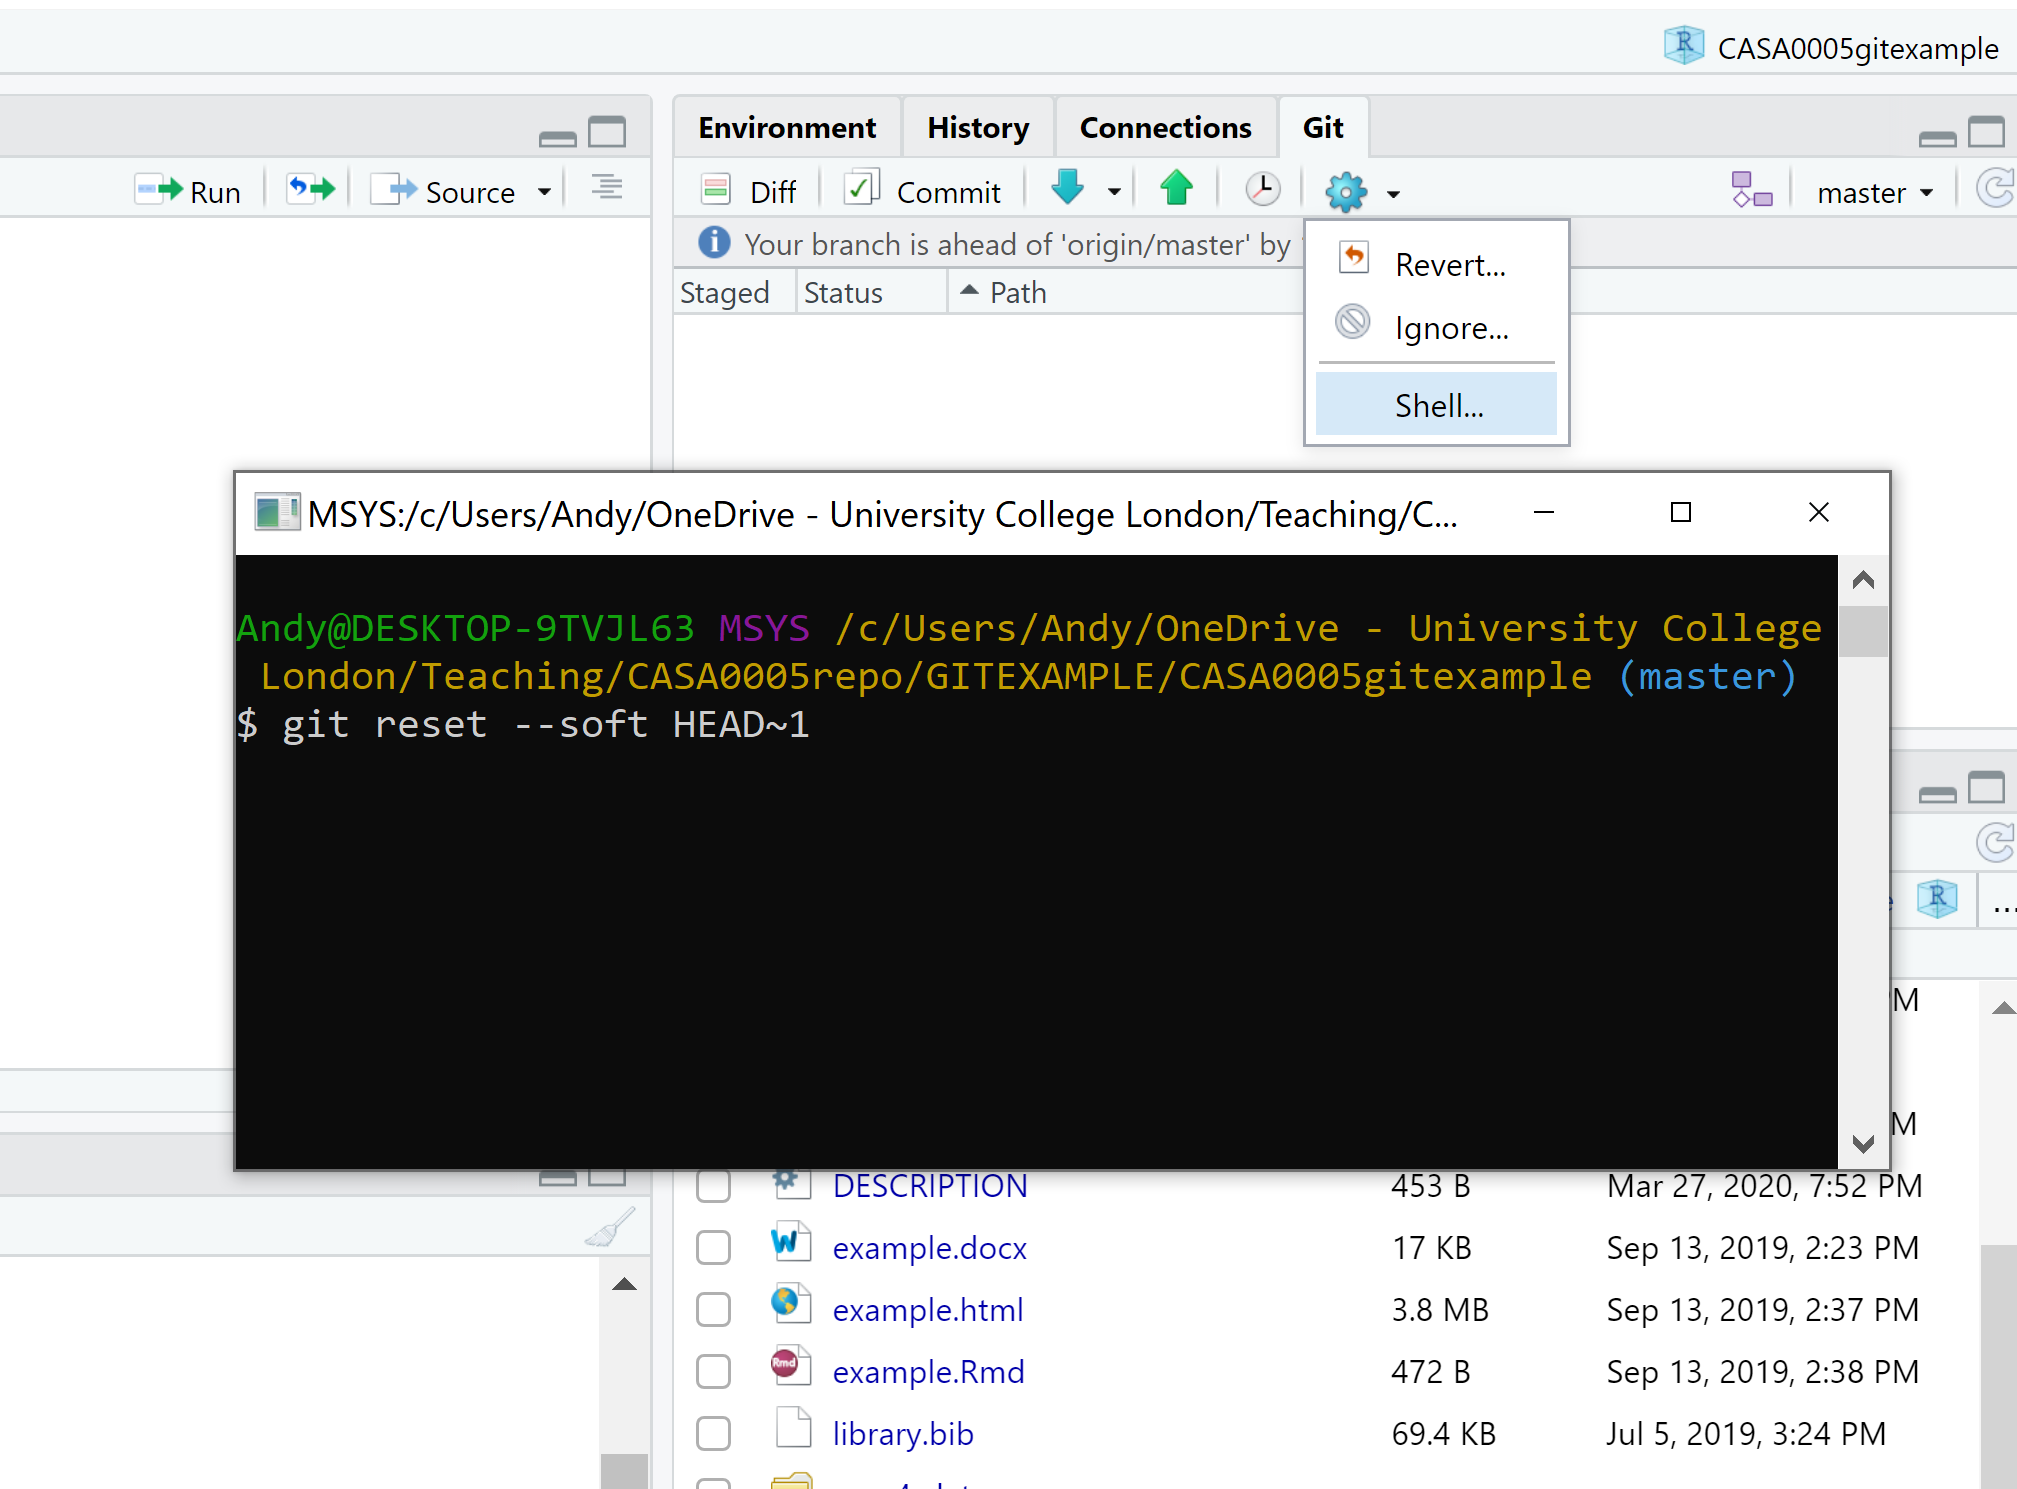
We have to use the shell again, click the cog icon then shell..
Now, there are two commands we can use here git reset --hard HEAD~1 or git reset --soft HEAD~1. These simply tell Git to reset to Head-1 commit (your current commit is the Head). Changing the number will alter how many commits you go back. Hard will delete all the changes in the previous commit, soft will move the changes we committed to the Git tab, reversing out commit — always use soft!
Type the command git reset --soft HEAD~1, the press enter…

You’ll see that the test_file.R has moved back to the Git tab. Now if you have forgotten what changes you actually made in the last commit, click the Diff icon (next to Commit) and it will show the changes made to each file.
8.17.1.2 GitHub
This section follows on from what we’ve just been through, however, now will we look at how to go back in time once you have pushed to GitHub
So change z to t and assign it a value of 2+1. Stage the file, commit to git then now push to GitHub. Think of this as case (a)
But wait…you missed off an extra 1, t should be 2+1+1. Add the extra 1 commit to git then now push to GitHub. Think of this as case (b)
But wait (again!)…more incoming news from management…t is wrong, is should be assigned to only 2+1,….but do they not know we’ve already pushed to GitHub several times!!
If we use reset once we’ve pushed to GitHub it will rewrite the commit history and won’t match with GitHub, so if you tried to push to GitHub you will get an error saying the tip of your local branch is behind the remote. This is because you have done back in time locally. It will ask you to pull the changes from the remote. If you have reset, made changes, tried to push, got an error, tried to pull — you will likely get a merge conflict message that you have to correct manually.
However, we can instead use revert to maintain the history and avoid any conflicts — revert adds a new commit at then end of the ‘chain’ of commits. In our case (b) is the current head, it will add a new commit that is our original (a) to the end of the chain. On the other hand reset will move your local main (or other branch) back in the chain of commits, but if you moved your local git back whilst your remote (GitHub) remains further along the chain this will cause an error and merge conflicts!
To use git revert you have two options either just: git revert HEAD or git revert [input commit ID] - but just get the commit ID for the latest commit nothing before it! Every commit you make will have an ID (called an SHA). To see the SHA just go to Diff (in the Git tab) > History (top left of the review changes window) — note down your SHA and use it in the shell command.
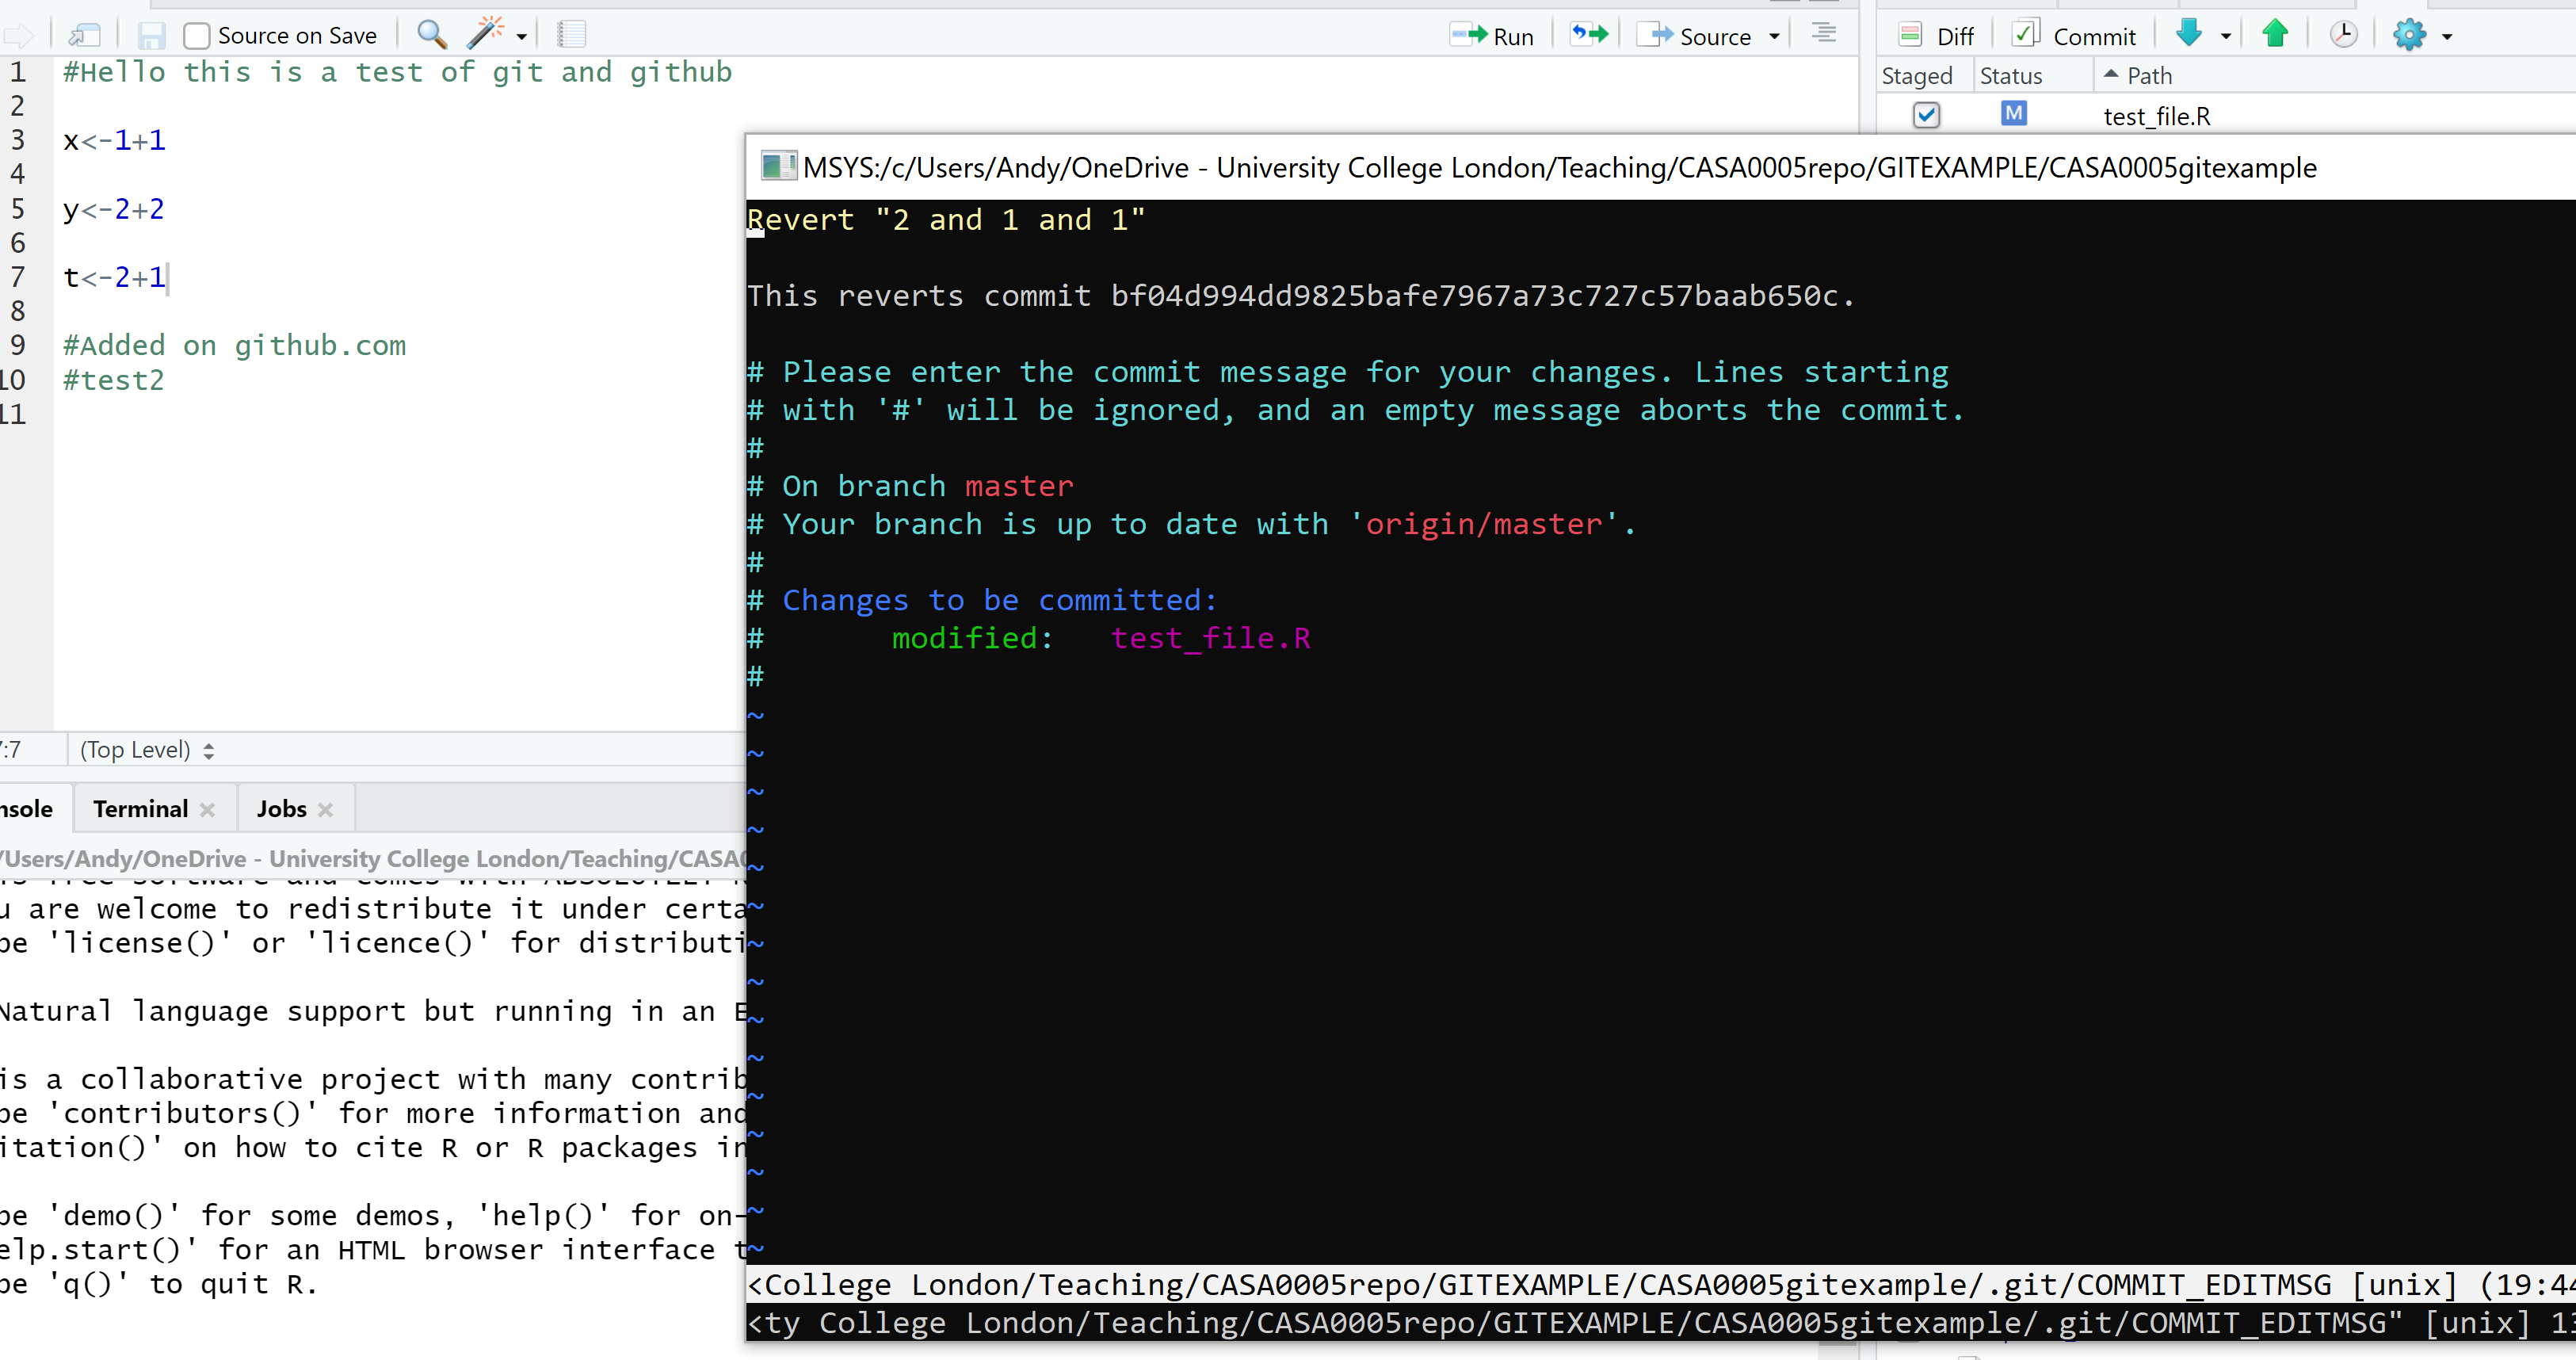
Ok, so to use revert go to the shell and enter git revert HEAD
You will probably be met with the VIM (or viewport) window. The best course of action is to input :q to quit and accept the default commit message. You will see already that my test_file.R has already been placed back in the Git tab and t<-2+1 again.

If you really want to change the commit message then you need to get into insert mode by typing i > modify text > exit the insert mode with Ctrl+C then > :q to quit. Thanks to the article by Melanie Frazier for this information.
If you are storing your R project in a folder that is synchronises online (e.g. OneDrive) you might have issues with this. When you use revert git locks a file which mean it can’t synchronise, if you try and do another revert git will not know who you are. It looks like the process of reverting still happens, but just be careful!
Also if you want to go back several commits as opposed to just one you must write the code as git revert HEAD HEAD~1 HEAD~2 and so on. Remember HEAD is the last commit you sent to Github, HEAD~1 the one before etc.
You could also specify this as git revert HEAD~2..HEAD, where i think it’s possible to replace HEAD~2 with a commit ID.
Boris Serebrov explains more advance usage of revert very well.
8.17.1.3 One final trick
What if you wanted to go back in time and restart from that point. Of course you could use revert. However another possible way is to trick GitHub by combining git reset --hard and git reset --soft. First do a hard reset to using the commit ID you want to go back to…
git reset --hard commit ID
Then do a soft reset to trick git to moving the pointer back to the end (or back to head), which is what the remote is expecting
git reset --soft HEAD@{1}
Then commit git commit -m "going back to x commit (or with the commit button) and push git push (or with the push button).
8.18 renv
Have you ever created an R script, come back to it later and wonder why it’s not working correctly? It’s probably because of package updates.
renv (pronounced R - env) can capture the packages used in your project and re-create your current library. You simply:
- Create a new project -
renv::init() - Create a snapshot -
renv::snapshot() - Call the snapshot to load -
renv::restore()
The package information and dependencies are stored in a renv.lock file.
When R loads a package it gets it from the library path, which is where the packages live. Sometimes there are two libraries a system and a user library - use .libPaths(). The system library = the packages with R, the user library = packages you have installed.
When you load a package it loads the first instance it comes across, user comes before system. To check - find.package("tidyverse")
All your projects use these paths! If you load different packages and versions of them + dependencies. E.g.
- Project 1 used
sfversion 0.9-8 - Project 2 used
sfversion 0.9-6
Switching between projects would mean you have the wrong version as they use the same libraries.
renv - each project gets it’s own library! Project local libraries.
When you use renv::init() the library path will be changed to a project local one.
It will create a lock file that holds all the package information.
To re-create my environment once you have forked and pulled this repository you would use renv::restore().
Of course some projects use the same package version — such as tidyverse, renv has a global cache of all the libraries. So there is a massive database of your libraries then each project library links it from there, meaning you don’t have 10 versions of the same tidyverse.